Arguably the hardest part of building a travel blog is coming up with your name. While the naming possibilities might be endless, finding a domain name that is short, recognizable, and/or clever is a whole different story. We’ll use GoDaddy, by far the biggest domain registrar in the world, for this tutorial.
Head on over to GoDaddy and create an account.
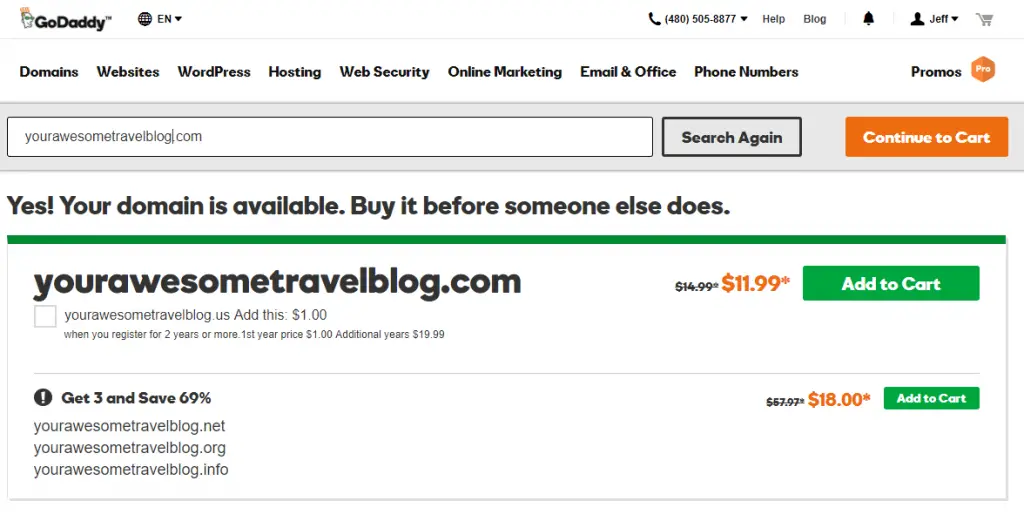
Next, we need to make sure your domain name is available. Pro tip: Use their Bulk Registration to check the availability of up to 500 domains at a time. Perfect for checking to see if a bunch of name possibilities are available, all at once.
When you find a domain that you like and is available, add it to your cart.
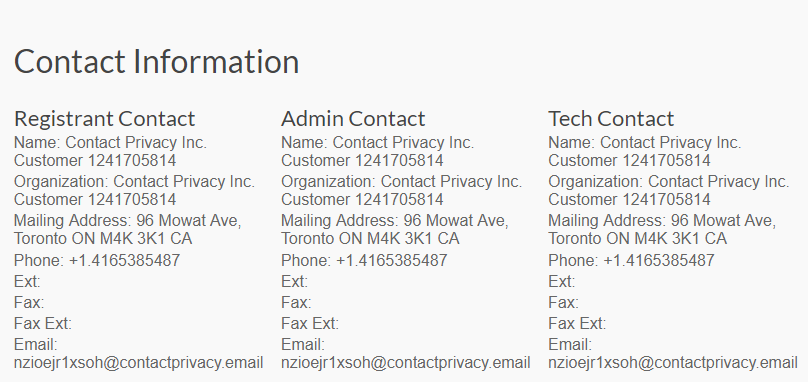
What is domain privacy protection?
The next step is to decide if you want privacy protection on your domain. For any website, you can run a report called a WHOIS. This report will show you the name, address, phone number, and email address for whoever registered the domain. Adding privacy will keep your personal information… you guessed it, private!
Privacy Protection is the only add-on you will need. Don’t opt in for anything else, like a free website, or an email address.
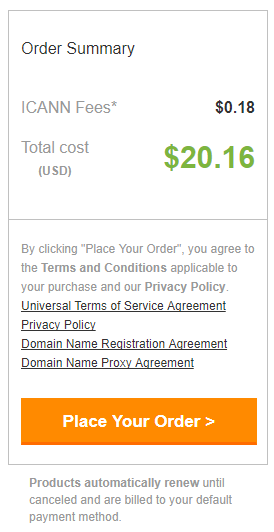
Now, decide how long you would like to have your domain registered. GoDaddy will default to five years and could give you a bit of sticker shock in before you checkout. If you want to take care of your registration for a few years, go for it. If you want to keep costs low, and renew your domain next year, just change the term to one year.
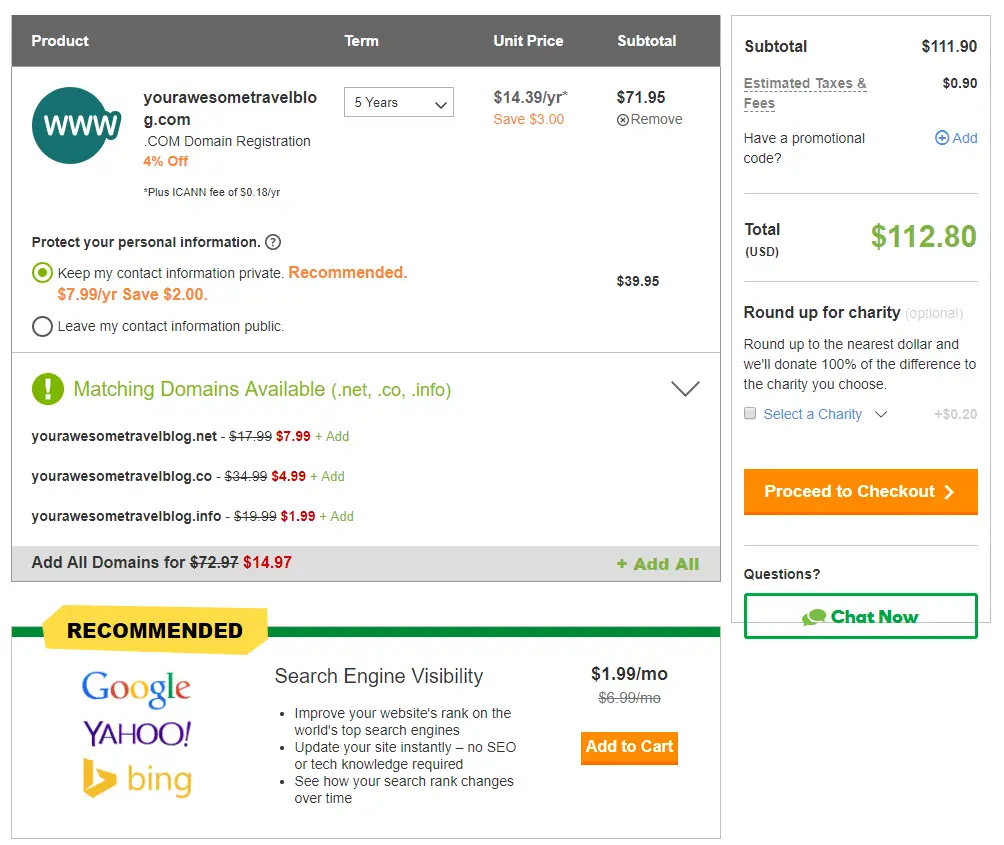
They’re also going to try and sell you the .net, .info, .co, and other matching available domains. If you feel strongly about making sure no one has your same name and you have the money, go ahead and add those, but you probably don’t need them.
You also don’t need the “Recommended Search Engine Visibility” package they offer- you can do this yourself and get better results later!
Proceed to Checkout, fill out the billing information and place your order.
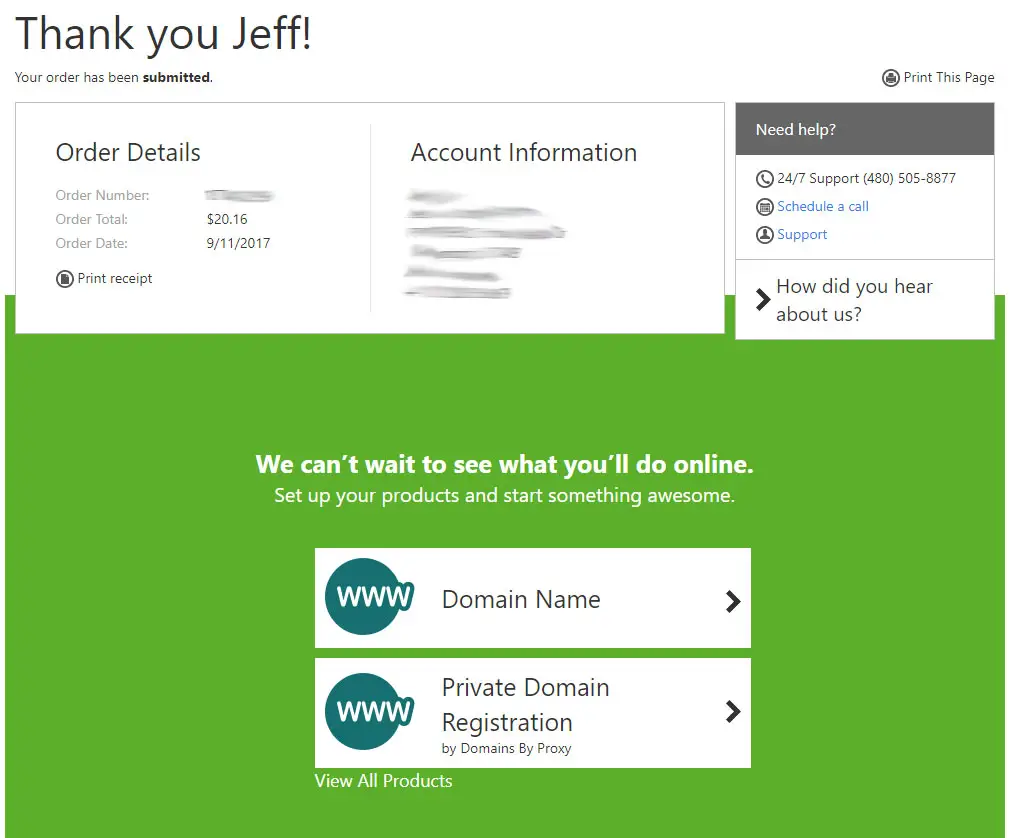
You did it! You now registered a domain for your travel blog!
Now you’ve taken the big leap and your new site has a name and it’s own domain. What’s next? Check out the next step in building your travel blog.
